Table of Contents
| Table of Contents | ||
|---|---|---|
|
Purpose & How to Use This Guide
Browse for an overview of the essentials of Cascade CMS, including navigating through the CMS, and creating/managing content. It is designed to be read chronologically and then used for reference.
Once you have reviewed the material, email webmaster@miami.edu, who will send you a link to the verification quiz.
Once this quiz has been submitted and reviewed your access will be granted, usually within two business day.
Completing basic training only gains you access to regular CMS websites and does not apply to the People site. In order to get access to the People site you will need to contact the appropriate People Profile Manager for approval.
Overview
Cascade CMS is a web-based content management system offered and managed by the Web and Digital team, part of University Communications. It provides an easy resource for creating branded websites, consistent with the University's central branding efforts.
Resources
For tutorials, videos, and tips, review our How-To Guide:
Basic Training GuideTo view available page templates and visual design elements, visit our Demo site:
https://demo.miami.eduTo request training, or for questions of any kind, e-mail webmaster@miami.edu.
Once access has been granted, use testing.miami.edu (in the CMS) as a sandbox to test your knowledge.
Log into Cascade CMS
Using a web browser, go to http://cms.miami.edu.
A UM Single Sign-On screen will load.
Enter your CaneID and Password.
Click on the Sign in button.
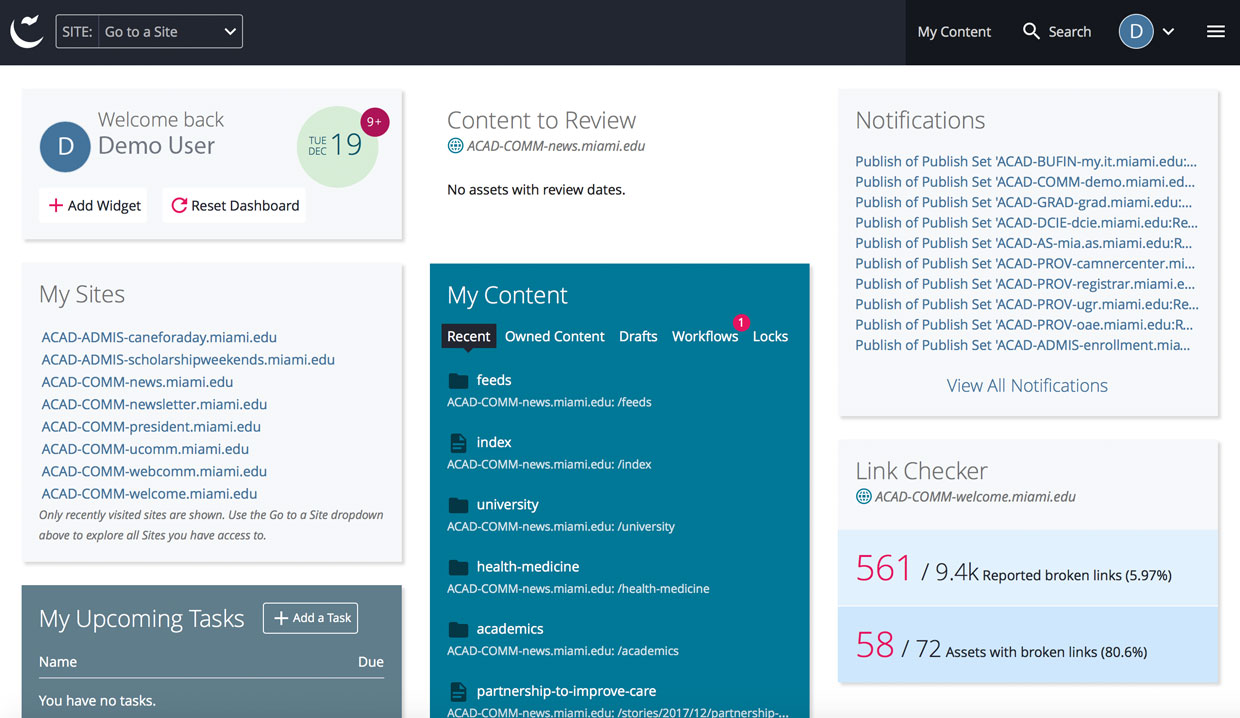
The Dashboard
Cascade’s Dashboard is the first screen you see when you successfully log in. It is a one-stop place for the management of your content, with movable widgets to set your own personal favorites.
Get to Know Cascade’s Interface
Cascade CMS 8 introduces a completely redesigned and reorganized interface, composed of the top menu bar, the asset tree, and the workspace.
Menu Bar

Home button (Cascade logo): Takes you to the site dashboard.
Site dropdown: Select your site from this dropdown menu. Type a site name to filter the menu when multiple sites are available.
Add Content: Used to create new content on your site.
Site Content: Displays assets of the current site.
Manage Site: An administrative menu to manage all the settings for the current site.
My Content: Quickly access all of the content you're responsible for.
Search Bar: Used to perform searches within the Cascade CMS content repository.
User Profile: Access your account settings.
System Menu: The system menu is the focal point for administrator-oriented tasks.
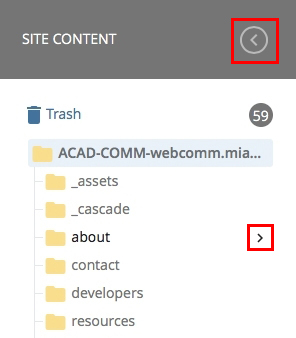
Site Content / Asset Tree
The asset tree on the left displays a hierarchical view of the folders and files that make up your site's content.
The asset tree is collapsible by the < icon to the right of the Site Content label.
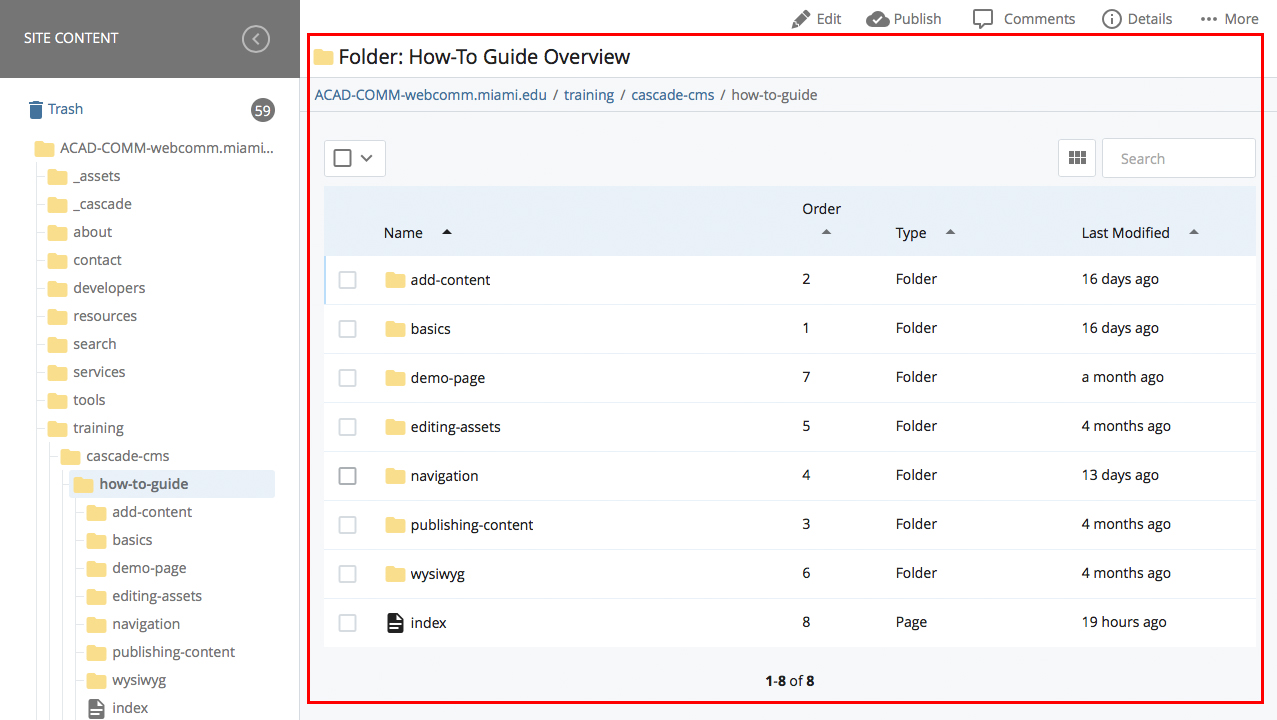
Workspace
The right pane of the screen, your Workspace, will display whatever you are working on. It will display the contents of a folder or a preview of an asset you've selected in the Site Content tree.
Select a Site
To view or edit one of the sites you have access to, select it from the SITE dropdown menu, also known as the Site Selector.
1. Click on SITE: Go to a Site.
2. Click on your site's name from the drop-down menu.
| Info |
|---|
You can type a site name in the Site Selector’s search bar to filter the list of menu options. |
Navigate your site content
The asset tree on the left displays a hierarchical view of the folders and files that make up your site's content.
Click on the folder icon or name to show the contents of the folder. Click again to collapse its contents.
Select a folder by hovering over the asset name and clicking on the arrow > that appears to the right. The contents of that folder will display in the Workspace on the right-hand side.

| Info |
|---|
For more information, see Interface |
Upload an image
In the Site Content tree on the left, click on the _assets folder. Then click on the images folder or a subfolder within the images folder.
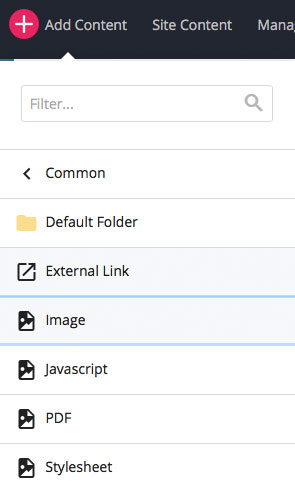
Click on Add Content.
Inside the Common folder, select Image from the dropdown menu.
Drag and drop an image from somewhere on your computer into the browser window, or choose one from your computer.
Fill in the Alternative Text.
Tip: The purpose of Alternative Text is to provide a description of the contents of an image file, and provide text for visitors who can't see images in their browsers.
Click Preview Draft. After previewing the draft, click Submit to make these changes permanent.
Publish the image.
| Info |
|---|
For more information, see Upload an Image |
Upload a PDF File
In the Site Content tree on the left, click on the _assets folder. Then click on the pdf folder or a subfolder within the pdf folder.
Click on Add Content.
Inside the Common folder, select PDF from the dropdown menu.
Drag and drop a PDF file from somewhere on your computer into the browser window, or choose one from your computer. The File Name will automatically populate with the file name previously given to the PDF file.
Click Preview Draft. After previewing the draft, click Submit to make these changes permanent.
Publish the PDF.
| Info |
|---|
For more information, see Upload a PDF File |
Replace Files (images, PDF, etc.)
Find file inside Cascade and click Edit.
Drop or choose the new file from your computer.
Click Preview Draft. After previewing the draft, click Submit to replace your original file.
Publish the file.
| Info |
|---|
For more information, see Replace Files |
Create a Folder
In the Site Content tree on the left, click on the folder where you wish to create the page.
Click on Add Content.
Inside the Common folder, select Default Folder from the dropdown menu.
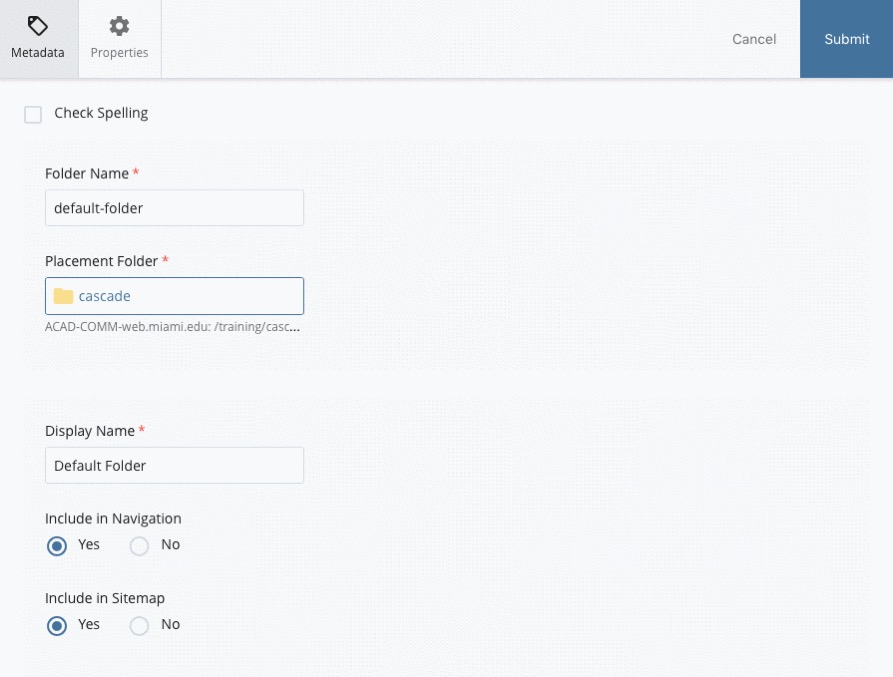
Fill in the Folder Name and Display Name.
| Info |
|---|
Tip: The Folder Name will generate the page URL; therefore, it should be all lowercase letters separated by hyphens, without underscores, special characters, or spaces. The Display Name will generate the labels for the left navigation, and could include capital letters, special characters, and spaces. |
Click Submit to save the folder to the CMS.
Publish the folder.
| Info |
|---|
For more information, see How to Add a Folder |
Create a Page
In the Site Content tree on the left, click on the folder where you wish to create the page.
| Info |
|---|
You must create a folder before you can create a page. |
Click on Add Content.
Inside the Site Assets folder, select one of the Interior Page templates from the dropdown menu.
Leave the default Page Name of index.
| Info |
|---|
There should only be one index page per folder. You can create sub-folders within a folder, however, each sub-folder can only contain one index page. |
Fill out the Metadata information for the page.
Fill out the Content Area with your content.
Click Preview Draft. After previewing the draft, click Submit to save the page to the CMS.
Publish the page.
| Info |
|---|
For more information, see How to Add a Standard Interior Page |
Left-hand Navigation
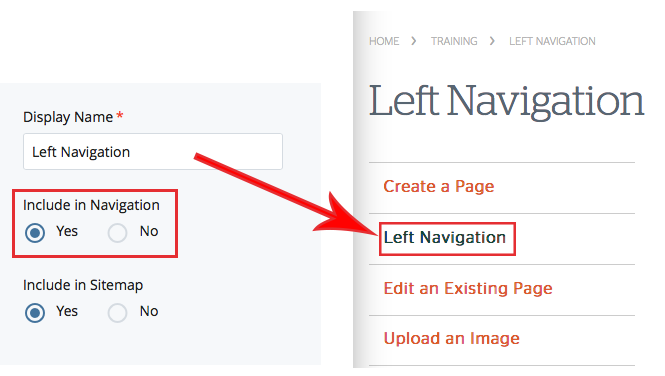
Your site’s left navigation is automatically generated from the hierarchy and order of the folders within the Site Content menu. This type of navigation is called dynamic navigation because it’s automatically generated and updated.
| Info |
|---|
The text that appears in your site's left navigation depends on what you enter into the Display Name field when you create a folder. |
| Info |
|---|
For more information, see Left Navigation |
Edit a Page
In the Site Content tree on the left, select the page you wish to edit.
Once the page has loaded, click Edit.

| Info |
|---|
You can also edit a page by right-clicking on the page name, and selecting the Edit option from the context menu. |
Edit the content using the WYSIWYG editor, or by making the desired changes to the text in the Content Area .
Click Preview Draft. After previewing the draft, click Submit to save the changes to the CMS.
Publish the page.
| Info |
|---|
For more information, see Edit an Existing Page and WYSIWYG editor |
WYSIWYG Editor
WYSIWYG is an acronym for “What You See Is What You Get.” The WYSIWYG editor facilitates web page creation, with formatting features you are most likely accustomed to using in your standard word processor.

Frequently Used Functions
Undo/Redo: Click to undo or redo your last action.
Bold and Italic: Click to bold or italicize your text. Select your text and click to apply styling.
Font/Image Alignment: Click to align your text/image either to the left, center, or right.
Formats: Create headings (h1 - h6) and paragraph blocks. Highlight the word or words you wish to format and click to apply.
Bullet and Numbered Lists: Select multiple lines of text and click to create lists. Unordered lists create a bullet list, and ordered lists will automatically number each item in the list.
Insert/Edit Link: Click to insert a link to another page, either internal or external. Highlight the word or words you wish to hyperlink and click to apply.
Remove Link: The remove link function will remove a link. Place your cursor within the linked text and click to remove.
Insert/Edit Image: Click to add an image to your page. Place your cursor where you would like to insert the image before clicking on function.
Insert/Edit Media: Click to add a video (YouTube or Vimeo) to your page.
Source Code: Allows advanced users, who have been granted access, to edit the HTML source.
Publish a Page
In the Site Content tree on the left, select the page you wish to publish.
Once the page has loaded, click Publish.

| Info |
|---|
You can also publish a page by right-clicking on the page name, and selecting the Publish option from the context menu. |
Select one or more of the outputs to Publish to the destinations selected.
| Info |
|---|
You can publish to two destinations, Production and Staging. The Production destination is a web server that delivers what is often called the "live site." The Staging destination is a web server used to test your content before publishing to a production server. |
Click Submit.
| Info |
|---|
For more information, see Publish Content and Destinations |
Verification Quiz (to get access)
Once you have reviewed the materials provided, email webmaster@miami.edu, who will send you a link to the verification quiz.
Once this quiz has been submitted and reviewed your access will be granted, usually within two business day.